Call (678) 365-3138
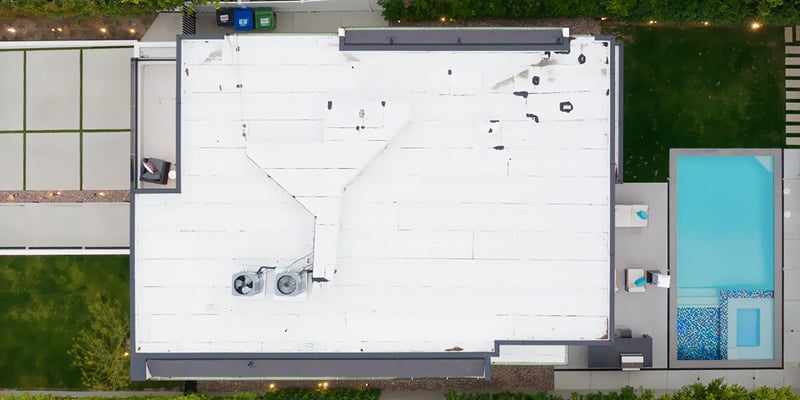
Commercial building roofs endure a lot because of weather conditions. A urethane roof coating might be important to make these important surfaces last longer and perform better. An answer like urethane roof coating reinforces a roof's durability and also has cost-saving advantages, especially in harsh weather. You'll learn everything you need to know about urethane roof coatings in this article: how to apply them and how to keep them in good condition.
We'll look at the job of urethane roof coatings and why they might be important for extending the life of your roof.
Let's dig in!

The Parts of Urethane Roof Coatings
When you start looking at the field of roofing, understanding urethane roof coatings can be really helpful - especially as you learn their functionality. The important ingredient in these tough coatings is typically polyurethane resins. These resins are important because they form a flexible, tough membrane that sticks easily to all sorts of roof surfaces. To help with their protective abilities, manufacturers add extras like UV inhibitors, plasticizers, and other compounds. UV inhibitors - to give you an example - are important in preventing the sun's harsh rays from degrading the coating and making its lifespan longer.
It's also a good idea to add plasticizers. These substances help with the flexibility of the urethane coating, which is important for accommodating the building's movements, like expansion and contraction. Temperature changes pose real challenges to a roof's durability. I think maintaining a roof's integrity over time, even through environmental challenges, is important.

Now, let's look into the types of urethane coatings available. You usually find two types: aliphatic and aromatic urethane coatings. Aliphatic urethane coatings stand out for their UV stability, which makes them an excellent choice for a topcoat. They also reflect sunlight, which can cut down cooling costs - which is surely a plus.
On the other hand, aromatic urethane coatings are cheaper and do well as a base coat. They may not match the UV resistance of aliphatic types, yet they are great at bonding well with the roof's base layers, which is important. Aromatic for bonding and aliphatic for protection form a smart strategy to help with a roof's longevity and efficiency.
These coatings are available in both single-component and plural-component setups, giving flexibility to meet the specific needs of your project. They fit well with all sorts of roofing parts, from metal and concrete to single-ply membranes - showing their flexibility. Handling these coatings might at first be difficult because of their strong, typically xylene-based smell during application, but the long-term benefits are surely worth the short-term inconvenience.
The true benefit of urethane roof coatings lies in their resistance to everyday wear and tear. Their durability and ability to accommodate thermal movements make sure they do well under all sorts of conditions, preserving the roof against both small effects and severe weather challenges.
Preparing the Roof Surface for Coating
I really value urethane roof coating for improving the lifespan and performance of roofs. The importance of its effectiveness begins with what I think about the most important step: the right surface preparation. If not done right, the application might fail to work well and could even cause further damage.
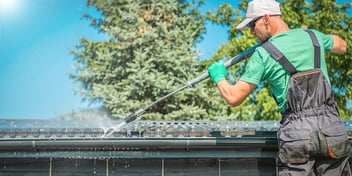
Firstly, making sure the roof is extremely clean is my initial priority. To remove all the dirt debris and any loose bits - I use a pressure washer that is 3,000 psi. I then make sure the surface is free from any residue that could prevent adhesion by cleaning it with a non-filming detergent. Have you ever dealt with algae or moss? I find that an answer of half laundry-strength liquid chlorine bleach and half water is useful. After letting it sit for 15-20 minutes, it is important to wash the area closely to prevent chemical damage.

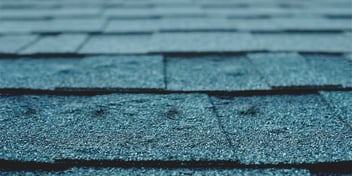
After cleaning, I check and repair any damage. It is important to seal any cracks or splits and to fix deteriorated areas with the right sealants. Every repair has to be double-checked because even slight damage can compromise the entire process.
The importance of allowing the roof to dry completely is a step I stress usually. Rushing this part has led many to face adhesion problems later. The drying time might extend beyond 24 hours depending on the weather. Before applying the coating on a bigger scale - I perform an adhesion test on a small area to spot any potential issues early.
When applying the coating, I adhere to a complete method. For an airless sprayer roller or brush, I follow the manufacturer's recommendations for thickness. The coating then needs patience during the curing phase, which may take 24-48 hours, depending on the environmental conditions.
Monitoring weather conditions closely throughout this process is really important. I always make sure that all my work avoids periods of high dew or frost, which can really affect the coating's adhesion.
Every step in this process is important, and any oversight or omission can really affect the outcome. My organized strategy for preparation and application guarantees the effectiveness and durability of the urethane roof coating, protecting the roofing investment.
How to Apply the Primer Correctly?
When it comes to applying urethane roof coatings, many people like to forget an important benefit: applying primer.
From my experience, carefully applying primer improves the durability and effectiveness of the roof coating. The process starts by closely cleaning the roof to remove all dirt, debris, and any previous coatings. This will ensure strong adhesion for both the primer and the urethane coat. Before proceeding - it's really important to fix any damage and make sure the surface is completely dry.

Picking the right primer depends on the roof type. To give you an example - roofs that keep moisture may need a moisture-curing primer, whereas roofs with smoother surfaces might need a primer that adheres better. The application method for the primer, rollers, or sprayers usually depends on the roof's size and the primer's specific properties. It's important to think about factors like temperature and humidity - I always want to apply it on a clear day with moderate temperatures to make sure the primer setting is right.
Following the primer application, you should use the same tools to apply the urethane coating. Depending on the roof's needs, you might need multiple coats to ensure sufficient coverage and protection. Each layer must dry and cure completely, typically taking about 24 to 48 hours before adding the next one. Once cured, the urethane forms a tough waterproof barrier that sticks well to the roof substrate, provided the primer is applied correctly. It's smart to check the roof after application to make sure of even coverage and the absence of gaps or weak places.
Maintaining the roof means scheduling regular inspections and doing needed touch-ups to make sure the coating continues to give protection. I would advise against skimping on the primer. It is just as important as the urethane coating itself to achieve a tough, useful result. Always follow the manufacturer's instructions for the products you use to make sure optimal outcomes.
Applying the Urethane Roof Coating
In my own projects with urethane roof coating, I've seen that it is important to pay careful attention and really understand the product. This type of coating is extremely flexible - it's a good choice for all sorts of surfaces like EPDM single-ply membranes, BUR, modified bitumen, and even concrete decks. Making sure the surface is fully prepared is important. You should verify that the roof is clean and dry and doesn't have any loose parts or debris that might affect adhesion.
There are basically two types of urethane coatings: aliphatic and aromatic. Aliphatic coatings work best as topcoats because they are UV stable and keep their color well which impresses me. On the other hand, aromatic coatings are cheaper and are commonly used as base coats. It is really important to follow the manufacturer's guidelines closely when applying either type to make sure of optimal performance.
The application can be done with sprayers, rollers, or brushes, depending on the size of the job and the roof's needs. For bigger areas, I like a sprayer as it gives even coverage and speeds up the process really. Rollers and brushes are my favorite for smaller areas or complete touch-ups. Achieving the right coating thickness is important, as typically it needs a few coats. Make sure to let each layer dry completely before applying the next to avoid any issues with drying or adhesion.

The benefits of doing this correctly are great. A well-applied urethane coating forms a tough waterproof barrier that easily deals with everyday thermal expansion and contraction and gives resistance to the features. UV stability is an extra perk - prolonging the roof's lifespan by reflecting sunlight and lowering cooling costs. To keep its condition - regular cleaning and inspections are advisable. Be aware that a strong odor will be present during the application because of the xylene base, but if managed properly, it will cause a strong protective layer that lasts.
From my experience, taking the time to cover all these points can make applying urethane roof coatings an important decision for ongoing roof maintenance. I've found it to be a reliable answer, helping you avoid problems and save money in the future.
Allow Time for Curing and Drying
I've gained a good understanding of how urethane roof coatings cure and dry from my experiences. This is important for achieving that perfect easy layer and is really important for its effectiveness. Urethane coatings - mostly solvent-based - form a tough barrier designed to protect the roof from the features. The important step to success is in the curing stage, where the chemical composition changes into a tough membrane.
Initially, as the coating starts to lose its solvents, it changes from a liquid state to a thicker solid film. The entire drying process depends on the latest temperature and humidity levels. Maintaining an environment around 70 degrees Fahrenheit is perfect as it prevents the urethane from becoming too thick too fast.

When you think about the effect of weather conditions, it is really important - challenges like dew and high humidity can make things difficult, especially when acrylic coatings are alongside urethane. I've achieved the best results by applying it during dry, mild weather and making sure no rain is expected for a few days around the application.
Timing also plays an important job - most urethane coatings I use, like elastomeric types, usually dry to the touch within 8 to 24 hours, provided the weather cooperates. But, the full curing process may extend if unexpected weather occurs. Moisture-cured urethane, which reacts with air humidity, tends to settle faster in hot, dry conditions. Understanding these details can really help with plating planning and application.
From my field experiences while working with urethane and awaiting its setting can stretch your patience. Making sure optimal temperature and humidity levels can really help with your roof's durability and overall performance.
Inspect and Keep the Coated Roof
I really like urethane roof coating - a liquid polymer that you can brush or spray on - to help with the lifespan and functionality of commercial roofs. This thing spreads smoothly even over the most uneven surfaces. It gives an easy barrier against moisture, harsh chemicals, and harmful UV rays.
Based on my hands-on experience, making sure the roof is super clean before applying anything is really important. Leaves, dust, or any moisture that remains can mess up how well the urethane sticks. Once you've cleaned everything, you typically move on to applying the coating with rollers or sprayers. It's incredible to see it turn into a thick, rubbery layer that integrates perfectly with the roof. This eventually dries into a tough, flexible surface that resists temperature changes well, which, as you can imagine, is very important for roofing.
Working in a massive warehouse in a place that was usually so hot and humid taught me a lot. The old roof was struggling under constant sun exposure and regular heavy rains - showing obvious signs of damage and potential leak places. The building owners were very happy with the reduced cooling costs from the new shiny roof.

The visible outcomes are what always impresses me about these urethane coatings. Seeing such changes in the real world is why I'm a big fan of this roofing answer, especially for those looking for affordable, high-performing options.
So if you now want to help with your commercial roofing, think about trying urethane coatings. They are a wise choice in many situations where you need lasting durability and big cost savings.
Why Choose Urethane Roof Coatings?
Before applying them, you first need to clean the surface closely and fix any damage or leaks. Sometimes, you might even need to apply a primer to make sure the coating sticks properly. The flexibility of urethane coatings lets their application on different surfaces like rubber, bitumen, or concrete - sprays, rollers, or brushes - based on the roof's condition and the specific type of coating used.
One great use of urethane coatings is their ability to be waterproof. They are especially useful in rainy areas or where water gathers on flat roofs. Urethane creates a protective barrier that is great at keeping water out and it also gives excellent UV protection - reducing wear and tear and reflecting solar heat. This helps keep the building cooler - cutting down the workload on air conditioning systems and leading to energy cost savings.

Again, urethane coatings are also very tough. They can handle chemicals, drastic temperature changes, and physical stress without losing their strength. Their flexibility lets them adapt to changes in weather, expanding and contracting without cracking or peeling. But applying them isn't always easy - as they can emit strong smells and need specific spraying equipment that will need careful maintenance. The choice between aliphatic and aromatic types affects both the cost and how well they guard against UV light.
People usually choose urethane roof coatings for their durability and adaptability across all different roofing systems. They are sometimes also called "Forever Roofs" because you can periodically recoat them to keep their effectiveness. Although the decision between aliphatic and aromatic types depends on your specific needs and budget - the overall advantages of protection and cost savings support the investment in urethane coatings.
Protect The Roof Over Your Head
Urethane roof coatings can really extend the life of your roof. They help keep the efficiency and longevity of roofing systems. Are you thinking about improving your roof with urethane coating? Initially, the process might look scary because of its demanding application and strict curing phase. Still, the benefits Add adding a roof that withstands severe weather and improves energy efficiency through better insulation.
Remember - the toughness of urethane roof coatings makes them an excellent choice for maximizing your commercial roofing investments. Picking the right team for your roof upgrades and maintenance is important.

At Colony Roofers, we're here to help. Think about calling us for a free inspection. Working with our team will ease your worries. It will make sure your roof receives the best standard of care. Reaching out to Colony Roofers will make sure your roof gets the expert attention it needs!