Call (678) 365-3138
- Home »
- Learningcenter »
- What is the best way to repair a hole in your roof
What Is The Best Way To Repair A Hole In Your Roof?
.png?width=900&height=400&name=HOLE%20IN%20ROOF%20REPAIR%20(1).png)
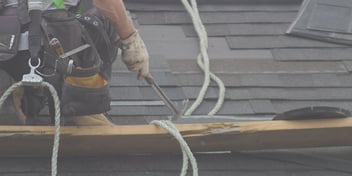
It's probably safe to say that every home or business owner's nightmare is finding a hole in their roof. No matter what causes it, it's never a situation you want to find yourself in. But you may also be wondering, how exactly is a hole in the roof fixed anyway? In this article we're going to take you through the steps of exactly how a hole in the roof is patched. Whether you're thinking about trying to tackle it yourself, or you're just curious how a roofing contractor does it, we've got you covered.
Can I Patch A Hole In My Roof Myself?
This is a question many homeowner's with a little construction knowledge or DIY skills may find themselves asking. It's not necessarily a straightforward answer, as there are a few things to consider:
- jIs The Roof Stable? - When dealing with any sort of damage to your roof this is the number one concern. Holes especially can come with underlying and unseen structural damage, and if you aren't sure how to spot it - or how to check for it - it's probably best to leave the patching to the professionals.
- Is Your Roof Under Warranty? - Now, whether or not your warranty will cover getting the hole fixed is another thing entirely (different warranties cover different things). But it's worth noting that if you DIY any kind of roof repair it will void most warranties, leaving you vulnerable down the road should you run into anything that would have been covered otherwise.
If you decide that you feel confident in your abilities, you know your roof is stable, and you won't be voiding any sort of warranty - it is possible to patch a small hole yourself. However, if you have any doubts, it's definitely best to call a qualified roofing contractor, because mistakes to patching a roof, or damage that isn't fixed properly can spell disaster down the road - and will end up costing you a lot more money in the long run.
How Is A Hole In The Roof Fixed?
Pending that your roof is in good condition structurally (aside from the hole) most roofing contractors will opt for a roof patch. This will extend the life of your current roof, and should buy you more time before a total replacement is necessary. Once your roofer (or you) gets up on the roof, these are the steps that will be taken to repair it:
1. Locate The Hole
The first and probably most straightforward step in any roof patch is this one. You've got to find the hole before you can fix it!
2. Remove Old Shingles
The next step is removing the old shingles. This is done using a pry-bar, and should be done from the top, working down. If there is water damage, shingles will need to continue to be removed until all the damaged area is exposed.
3. Remove Any Nails Left Behind
Not all of the nails will come out when the shingles are removed with the pry-bar. The next step in prepping the area to be repaired is to take the claw end of a hammer and use it to remove any nails that did not come out with the shingles.
4. Cut Out The Damaged Plywood
Here is where many homeowner's may start to think calling an experienced roofing contractor may be a good idea. The next step is using a circular saw (yes, up on the roof!) to cut out the entire section of damaged plywood and remove it. This may need to be done by working in sections, cutting two holes to avoid cutting into the rafter.
5. Create Framing
Next, using 2 x 4's a new frame will be created before the replacement plywood is laid down. The 2 x 4’s are attached to the underside of the remaining good plywood with 8-penny nails. The braces need to extend at least the length of the hole on either side, so that the brace is three times the length of the hole. If the being patched is a larger one, the framing will need to be created by attaching the 2 x 4’s to the rafters with 10-penny nails. Usually this part requires entering the attic and working from below to nail the 2 x 4's to the plywood.
6. Cut New Plywood
In order to cover the hole, the next step is to get the exact dimensions of the hole and cut new plywood to fit.
7. Attach The New Plywood
First, liquid nails need to be applied to the new plywood using gloves. It gets fit into the hole, and nailed to the framing with 8-penny nails.
8. Apply Tar Paper
Next, roofing cement needs to be applied to the seams where the new plywood meets the existing plywood. Tar paper is then laid over the patch. The tar paper needs to extent two inches beneath the existing shingles, and is then nailed into place.
9. Attach New Shingles
New shingles are attached, working from the bottom to the top. Roofing nails are used to attach the new shingles to the plywood, then they are covered with roofing cement to prevent leaking around the nails. And the hole is patched!
Need To Call A Pro?
If you've got a hole in your roof that needs patching, it's always our recommendation to call in a professional. They'll make sure it's done right, done to last, and it won't void any existing warranty or impact any future insurance claims. At Colony Roofers, we always offer free 30 minute inspections, and have a team of licensed and friendly staff available to answer any questions you may have. Call us today!