Call (678) 365-3138
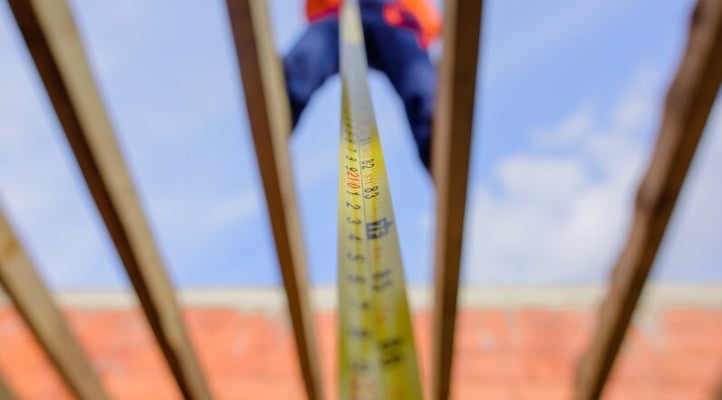
You need to know that a small measuring mistake can cost you a lot of money on your roofing job. So you should learn about linear feet to estimate the parts, so you only buy what you need. Throughout history and in today's roofing, exact measurements are important.
When it comes to yourself as a contractor, you could be stuck with not enough parts halfway through because you didn't measure linear feet the right way. That means delays and more costs. Really, you don't want this to happen when you can stay away from it with the right help!
Let's talk about this!

What Is Linear Feet?
A linear foot is a simple unit used sometimes to measure length in a straight line, and it's equal to 12 inches. You sometimes use it in things like roofing and construction and moving services.
When you measure length in a straight line, it comes to linear feet. Think about a ruler - you see length only and without width or height. This differs from square feet, which cover length and width.
As you know, learning to calculate linear feet is important in roofing. You'll sometimes need to find the total length of something, like when you need to decide how many feet of flashing you need. Always count the linear feet of all the edges it will cover. It's easy and important.
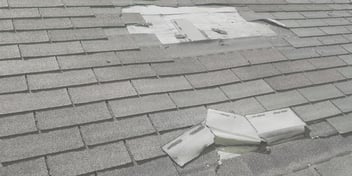
Picture this: mixing up linear and square feet could leave you short on parts. It's bad for your budget! Think about needing 100 linear feet of shingles, but you accidentally calculate for square feet. You'd end up with way too much material. That drives up costs and wastes time. This error can hurt your budget and delay your project. Think of it like ordering twice as much food for a small dinner party - unnecessary and really wasteful.

Learn why this matters in roofing. Linear feet help when you measure drip edges, ridge caps, and even gutters. Missteps here could throw off your timelines. Maybe keep a tape measure and notepad and calculator handy. Always double-check your measurements. It saves a lot of headaches later!
Do you think you had enough parts only to find out mid-project you were wrong? Stay away from that pitfall by accurately counting linear feet from the start. It's a good idea to double-check your calculations! Misjudging can hurt your schedule, force extra runs to the store, and even compromise your project's quality.
If you keep things easy with linear feet, you steer clear of complexities like roof overhangs and make measurement simple. Just measure everything, always considering linear feet. Your budget and timeline will thank you!
Let's talk about the important tools you need for calculating.
Tools You Need to Calculate
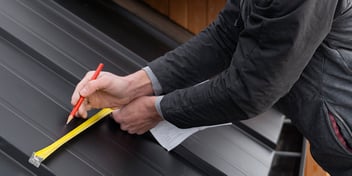
Measure linear feet accurately in your roofing project without needing fancy equipment. You should grab a good measuring tape - an essential tool for every roofer. Try to choose one that's sturdy and retractable and has metric and imperial measurements. Then use this helpful tool to measure lengths, widths, and heights accurately.
Sometimes, you should use laser measuring tools, which can also help quite a bit. These helpful devices use laser beams to measure distances and dimensions. So, save time and effort- especially on bigger and more complicated roofs because these tools are precise and efficient. Some professional roofing companies even use specialized drones.
Next, you should use a measuring wheel for longer distances. Roll it along the surface you're measuring and get an accurate readout. Maybe combine it with your measuring tape for a more helpful approach to getting measurements right.
Don't forget to introduce graph paper and a calculator either. First, you can use graph paper to create scale drawings to keep lines straight and make measurements clear. Trust a calculator to handle complicated math tasks and reduce easy math errors. This way, you stay away from expensive mistakes.

Remember to study roofing estimator apps and software, and use those tools. Input your measurements and roof specs to calculate the roof area, the number of squares needed, and material needs. Sometimes these helpful apps reduce human error and save time, which makes them valuable for your projects.
Also, when adding CAD technology, you can create complete 2D and 3D roof models. Faster generate precise drawings with accurate measurements, angles, and shapes. If you enjoy creating complete visual plans, this tool fits your needs pretty well.
Finally, stick with basics like a notepad, pen, and calculator, too. You should keep notes on measurements and calculations with a reliable pen. Perform math tasks accurately with a helpful calculator. These easy tools form the foundation of your precise roofing measurements.
Now, you can learn how to measure linear feet the right way in your roofing projects.
How to Measure Linear Feet Correctly
Start with measuring the roof's width and length. These measurements will give you the total square footage you need to find out linear feet. Think you have a roof that's 20 feet long and 10 feet wide - that adds up to 200 square feet.
After that, check the width of your roofing material. Let's say it's 3 feet wide. Then, divide the total square footage by this width. So, 200 square feet divided by 3 feet gives you roughly 66.7 linear feet. You should round it up to 67 just to be safe.
To smooth things along, break large roofs into smaller sections. Doing this helps you stay accurate. Measure each part separately and then add up the linear feet together. Big jobs can feel a bit scary - breaking them down makes things manageable.
Try to stay away from typical mistakes. One huge error is to ignore the roof's angle and curvature. This can really hurt your measurements. I once knew a contractor who used a rough guess and ended up short by 10% when the work started - it threw everything off schedule and cost more money. Double-checking would've saved them.

Always measure in feet. If your tape measure shows inches, change them to feet by dividing by 12. With care, add these measurements together and factor in any overhangs. Checking your math twice is worth it. Small mistakes here can turn into big costs later.
So, add a buffer for waste and cutting errors. You'll trim here and cut there - and before you know it, you're out of materials. Adding a buffer prevents surprises. Round up all measurements to the nearest whole number.
Experts do this all the time and can give you good advice. When in doubt, play it safe and ask a professional (like us at Colony Roofers!).
You might want to talk about how to calculate roofing material in linear feet. Let's talk about that next.
Calculating Roofing Material in Linear Feet
First, grab your tape measure and measure the length and width of your roof. You need these numbers to find out the total roof area. Once you have the area, basically divide it by the width of the material you plan to use. You've just figured out the linear feet you need.
For shingles, you should remember each "square" covers 100 square feet and usually needs three bundles. Check the package for specifics and remember that specialty shingles might vary. Also, just add an extra 10-15% to your total for waste. This will make sure you have enough for mishaps and irregular places without running out mid-project.

When calculating the drip edge for flashing, always divide your linear feet by 10 and add 5. This makes sure you cover necessary overlaps and cutting. Use the perimeter measurements for starter shingles. You could either cut ridge shingles from regular ones or buy them pre-made.
For felt and nails, well, some different rules apply. Choose to find out the number of felt rolls based on the squares to cover. Usually, you need one box of nails for every 20-25 squares. Have a chimney? Make sure to include at least one box of step flashing per job to keep your roof leak-proof.
Round up your estimates for simplicity. Always round up to the next full bundle! A roof pitch calculator can help you find out your roof slope in your calculations. Or, maybe a roof measurement service or DIY software can save time and help with accuracy.
Are you curious about how to deal with waste? Add 10-15% extra to your total material calculation. For some complicated roofs, you can use a pitch calculator or professional services for accurate estimates. I think these tools make your calculations easier and even faster.
Here's a quick guide: Measure the roof's length and width, then multiply them to get the area. Divide this by the shingle width to get linear inches and convert to linear feet. But a square equals 100 square feet and usually needs three bundles of shingles - always add 10-15% more to cover waste.
Double-check your measurements and calculations to stay away from mistakes. Try to use standardized formulas to get precise estimates.
Now, let's talk about why getting these calculations right is so important. We don't want any surprises!
Why Accurate Calculation Matters
Calculating linear feet for your roofing projects changes your whole workflow and budget. Don't let mistakes make you buy too much or too little material! Think about yourself dealing with a lot of leftover shingles or worse, running out of supplies and delaying your project. Let's break this down with some easy steps.
Try not to waste money by buying too many things. When you order 20% more shingles than you need, extra products tie up your cash and clutter your work site. If you run out of parts, your crew has to wait for supplies, wasting labor hours and hitting morale. You want to finish your projects efficiently, don't you?
Make sure to watch out for roof complexities like dormers and irregular valleys. You don't want to waste parts or end up short - always resurvey and double-check those difficult places. Maybe you've worked on a roof and ignored overhangs in the first measurements? Those surprise shortages are nightmares!

So, stay away from mis-measuring - you've seen people mix up units or forget cutting and waste parts, or end up short and the project suffers. Always add a bit of a buffer for those messy cuts.
In fact, you can use linear feet for most estimates - it's easy and clear. Don't just trust one set of measurements and always double-check everything. Two heads or measuring tapes are better than one. Most just people talk to seasoned pros like us at Colony Roofers.
Picture needing 1,000 linear feet of piping, but your estimate is off by 10%. That's 100 feet extra or an expensive 100-foot shortage! Roofing errors are just as bad - I'm talking about parts. Bad estimates interfere with job site safety, too. Extra parts turn into tripping hazards, while shortages rush your team into risky actions. It sounds like a DIY can save you money, but it could end up costing you thousands or even tens of thousands of dollars.
It's true that accuracy will stay around if you follow building codes and warranty rules. Manufacturers base guarantees on precise measurements. Complete estimates make your bids honest and competitive. However, accuracy is your best tool when you calculate. So, consult your team, use reliable tools, and always double-check! Efficient planning on paper turns into smooth and efficient work on your roof.
Protect The Roof Over Your Head
What a ride you've had talking about the details of measuring and calculating roofing projects! You know how important it is to start with the small details and check every calculation twice. Always double-check your measurements to save time and money and stay away from frustration down the line. You see, little things sometimes hold high importance.
When you think back on the tools and techniques you've learned about - accuracy really matters. You should use classic tools like measuring tapes and graph paper or modern ones like laser measurers and online pitch gauges to shoot for accuracy. Have you ever been in the middle of a project and wished you had double-checked a measurement? Right here - these moments point out the need for preparation and careful work.

Next, start with your roofing needs confidently, knowing experts are available to help. At Colony Roofers, we specialize in commercial and residential roofing services and we are based in Georgia, Florida, and Texas. Protect your investment and safety by trusting your roof repair to the pros. Contact us for a free inspection! Let our professional team care for your roof. You can get expert advice and noteworthy repair and installation services by reaching out today!
As you wrap things up, you should understand the importance of accuracy and expertise in your projects. So, what steps will you take to ensure your next roofing job goes smoothly? Whether you handle it yourself or hire pros, thoroughness and careful planning are your best bet.