Call (678) 365-3138
So, can you do your own gutter installation?
Your house doesn’t have gutters, and you realize the importance of having gutters. So, do you have to hire somebody to do a gutter installation? Or your wondering, “Can I install gutters myself?” The answer to that is yes, but it may not be as easy as you think. You can purchase the pieces you need, and it will come with gutter installation instruction, but there are some questions you’ll still have. It is those questions that we’re going to try to answer here.
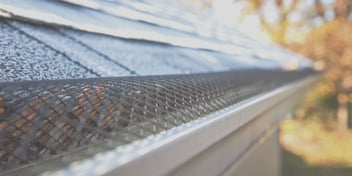
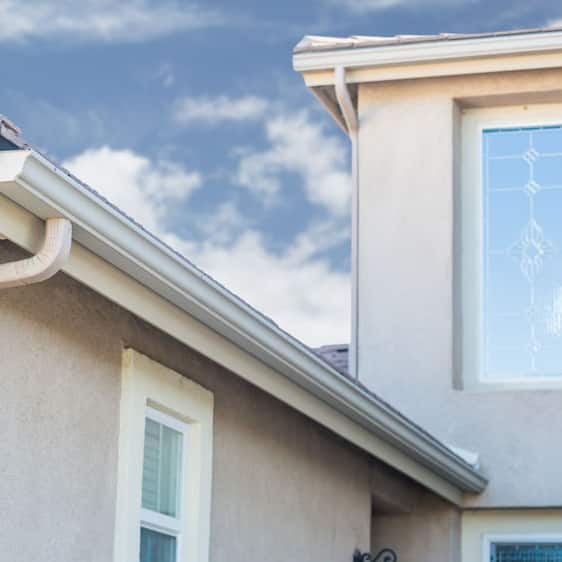
Downspouts and rain gutters collect rainwater and carry it out and away from your home. Without a gutter system, that rainwater will erode the soil and seep into the foundation, splash, and splatter dirt on the siding. In time, the rainwater seeping into the foundation will make its way into the basement or the crawlspace.
Typically, homeowners have their gutter installation done by professionals, but if you’re decent with basic tools and don’t have problem with heights, you can your own gutter installation. You’ll find the materials and accessories you’ll need at your local home improvement center, a lumberyard, or a local roofing-supply firm.
Here, we are going to provide basic gutter installation steps, but your gutter system will likely come with the manufacturer’s instructions too. Before you start the following steps, check for rot along the fascia and make any repairs needed. It is easier to do it now then later.
1. The Chalk Lines
- Starting at the gutter run’s highest point, mark the fascia 1-¼ inches down from the metal drip-edge flashing.
- At the fascia’s other, mark the low end, remembering that the slope should be half an inch for every ten feet of gutter run.
- Between these two point, snap the chalk line.
2. Install the fascia brackets
- Pinpoint the rafter tails locate behind the fascia; usually found on 16” centers and recognized by the nail heads.
- Along the chalk line, mark every other rafter tail.
- Make a pilot hole ⅛” in diameter through the fascia, into the marked rafter tail.
- Using quarter inch stainless steel lag screws, fasten the fascia brackets sot the screws are in two inches. Stick each lag screw in a bar of soap to make them go in the fascia board and rafter tails easier.
3. Cut the gutter to length
- Cut the gutter sections to length using a hacksaw or a 12-inch power miter saw.
- For a gutter installation that goes around a corner, cut a 45 degree angle on that corner end.
- If there are two sections of run in your gutter installation, overlap the two pieces by 8 inches and connect together on the bottom side with self-tapping, 3/8” long stainless steel screws.
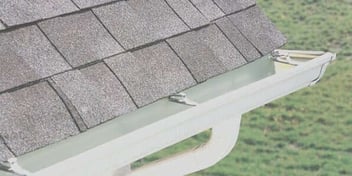
4. Install the end caps
- At the square-cut end of the gutter run, attach an end cap using aluminum pop rivets.
- Hold the end cap with a single sheet metal screw temporarily, then drill a hole that is 1/8” in diameter and install a pop rivet.
- Use a pop rivet to replace the temporary screw.
- Use a silicone caulk to seal the rivets and the end-cap seams.
5. Cut holes for downspout
- Your gutter installation kit probably came with a downspout outlet to trace the location for the downspout on the lower end of the gutter by running the gutter upside down with the outlet on top.
- Trace inside the outlet mark where downspout will go on the gutter.
- Drill a quarter inch in diameter hole in the center of the outline.
- Turn the gutter over and with a 4” hole saw, cut the downspout hole.
How do you attach gutters?
The next step will guide you on how to install the gutter runs:
- Place the gutter run in the brackets that are fastened to the fascia.
- Turn the gutter upward so the back edge slips in the hooks at the bracket tops.
- Drill a hole3/15” size through the bracket screw-mounting hole in the gutter front edge.
- Secure the gutter run to the bracket with a 1” inch long stainless steel machine screw with a flanged nut.
Form strip-miter joint
- Cover the joint between gutter run lengths at each corner with a 3” wide strip of aluminum.
- Wrap the strip tight around the gutter underside and secure it with 8 sheet-metal screws.
- From the top, cut a triangular section the strip and fold down the two flaps around the gutter top edge.
- Caulk these joints with siliconized caulk to waterproof.
Finishing Up
Connect the downspouts to gutter by securing to the gutter with screws and connect the downspout elbow to the protruding. Connect another elbow to the house and make a piece of downspout fit between the two elbows. With needle nose pliers, crimp the elbow to fit in the downspout and connect all together with screws.
Do you install gutters under drip edge?
It is recommended that your gutter installation with drip edge either behind or under the drip edge of the roof. With a proper gutter installation below the drip edge, the water could drip behind the gutter run, damaging the fascia and other supporting components.
How do you seal a gutter joint?
Yes, and you could use any type of caulk that will stick to a clean and dry gutter. However, what you don’t want to use to seal gutter joints is a silicone caulk. While this product will stick to a dry surface and makes a tight water bond when cured, you can’t paint it. So, what kind of caulk should you use? Here are three that are recommended for sealing gutter joints once you have completed your gutter installation:
- Butyl Rubber Caulk: Butyl rubber caulks are an excellent choice to repair a leaky gutter. It works well in cold and hot temperatures, adhering quickly as it cures and keeps it flexibility.
- Polymer Based Caulk: A professionally used caulking compounds, this is an excellent choice to repair leaking gutters and for a new gutter installation. Choose a tri-polymer caulk that is a hybrid polymer formula without any solvents. It won’t shrink while curing, works good on aluminum or PVC gutter systems.
- Urethane Based Caulk: This contractor grade caulk is an excellent choice to repair your gutter system, using a composite of polyurethane and urethane instead of silicone but has the qualities that silicone caulk offers. Qualities like flexibility, long lasting, quick curing, and UV resistant.
Why does water leak behind my gutters?
If there is water dripping behind your gutter runs, this typically indicates the gutter installation was done in correctly. Meaning, there isn’t a gutter apron installed and bent over the backside of the gutter and tucked under the shingles.
Okay, maybe after reading this, you’ve given it some thought and perhaps hiring a professional for your gutter installation is the better plan. So, do roofers install gutters? Yes, a roofer can do a professional gutter installation, however, they do not repair gutters. There are companies that do both, gutter installation and repairs. Need gutter installation in [nw_data field=seo_city], [nw_data field=state]? Call (678) 365-3138 today.